Assembling Our High-Performance Minecraft Server: AMD Ryzen 7900
Sep 18, 2024 · 3 min read

At Minecraft-hosting.pro, we pride ourselves on providing top-tier Minecraft hosting solutions designed for peak performance and reliability. Our latest server build is centered around the AMD Ryzen 7900 processor, a powerhouse that delivers exceptional processing speed, stability, and efficiency.
Why We Chose the AMD Ryzen 7900 Over the 7900X
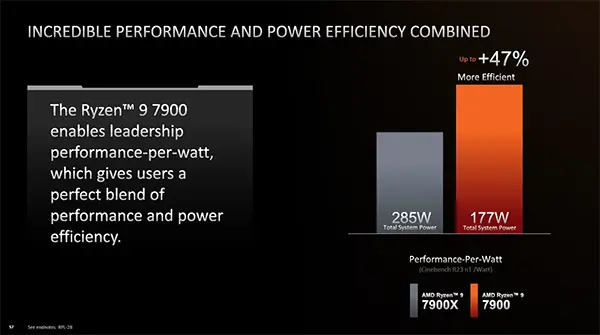
After careful consideration, we selected the AMD Ryzen 7900 over the 7900X because of its superior energy efficiency and lower heat output, making it a more reliable option for long-term server performance. The Ryzen 7900 consumes twice as little power and generates significantly less heat compared to the 7900X, all while offering the same performance levels. These factors make the 7900 a better choice for server environments where consistency and reliability are critical.
By minimizing power consumption and reducing thermal load, this processor not only helps to lower operational costs but also contributes to a more stable and longer-lasting system, ensuring your Minecraft server runs smoothly 24/7 without unnecessary hardware strain.

Key Components of the Assembly
AMD Ryzen 7900 Processor

Known for its unparalleled multi-core performance and energy efficiency, this CPU ensures seamless operation even under heavy workloads. Minecraft servers, especially those hosting large worlds and multiple players, demand high processing power, and the Ryzen 7900 handles this effortlessly.
192GB DDR5 RAM (4x48GB Corsair Vengeance 5600MHz)
 We equipped the server with four sticks of Corsair Vengeance DDR5 RAM, each with a blazing 5600MHz speed. This guarantees that the server can manage large-scale player traffic and intensive modpacks without breaking a sweat.
3x 2TB Seagate Firecuda 530 NVMe SSDs
 Speed and reliability are critical for any hosting setup, and the Seagate Firecuda 530 SSDs, each with 2TB of storage, ensure rapid data access, fast load times, and robust durability. This storage configuration is ideal for quick backup and restoration, enabling fast world saves, mod installations, and server updates.
Supermicro 1U Chassis with Platinum 93% Efficiency Power Supply
 Our choice of the Supermicro chassis allows for efficient airflow in a compact form factor while keeping the system running cool and quiet. The Platinum-rated power supply ensures 93% energy efficiency, minimizing power waste and ensuring cost-effective operation while maintaining peak performance.
The Assembly Process
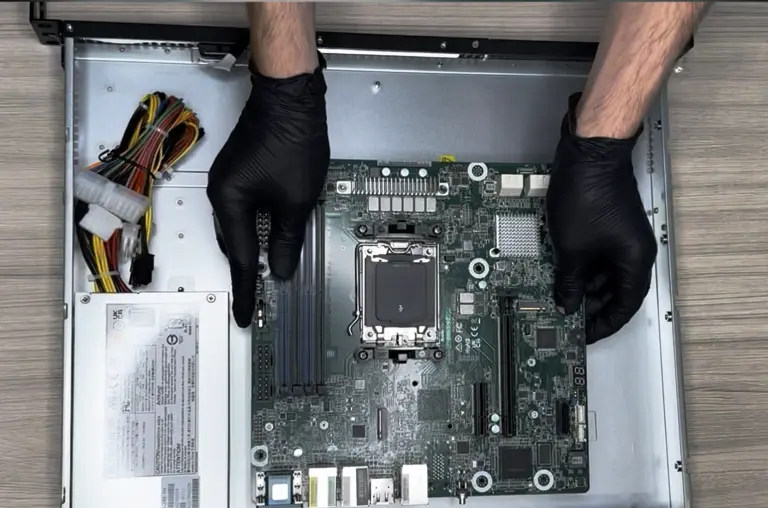
In the video below, you can witness the step-by-step assembly of this cutting-edge Minecraft server setup, showcased by our team. Here's a breakdown of the correct process:
- Preparing the Server Case: The process begins by preparing the Supermicro chassis, ensuring it's ready to receive the motherboard.
- Installing the Motherboard: The motherboard is carefully installed into the chassis, aligning with all required slots and securing it in place.
- Installing the CPU: The AMD Ryzen 7900 is mounted onto the motherboard, making sure the processor is properly seated and locked in.
- Installing the Memory: The DDR5 Corsair Vengeance memory modules are installed, ensuring they are correctly aligned and seated.
- Connecting the Power Supply Cable: Once the motherboard and major components are installed, the power supply is connected to ensure the system receives adequate power.
- Installing NVMe Drives and PCIe Adapter: Next, the three Seagate Firecuda 530 NVMe SSDs and their PCIe adapters are installed for maximum data transfer speed.
- Installing the CPU Heatsink: A high-performance heatsink is installed over the CPU to manage heat dissipation and keep the processor cool during high loads.
- Connecting Front Control Panel Cables: All necessary control panel cables are connected for front-end management of the server.
- Connecting Fans: Fans are installed and connected to ensure optimal cooling within the chassis.
- Connecting Power and Network for Boot Test: The server is then connected to a power source and network to perform a boot test, ensuring all components are functioning properly.
- Server Case Closure: Once all tests are complete, the case is closed up, securing the hardware for deployment.
Watch the full assembly process in our video to get a detailed, visual look at how we put together this server configuration.

Why This Setup Matters for Minecraft Hosting
At Minecraft-hosting.pro, we understand the importance of reliability and speed for your Minecraft server. Whether you're running a small server for friends or a large-scale community server with hundreds of players, this build ensures you have the power and performance you need. The combination of the AMD Ryzen 7900 CPU, 192GB of DDR5 RAM, and ultra-fast NVMe SSDs offers incredible speed, low latency, and high resilience to ensure your Minecraft world runs smoothly, with minimal downtime.
The Ryzen 7900's efficiency, lower power consumption, and reduced heat generation make it a long-term, reliable solution, ensuring your server performs at its best without the risk of overheating or unexpected downtimes.
Get Started with a
Minecraft Server
Looking to create your own minecraft server? It only takes a few minutes.
